Average Reviews:

(More customer reviews)I just installed this bracket on my concrete garage wall. This unit is quite heavy, and provides for infinite adjustment which was my major reason for purchase versus the alternatives. As noted in prior reviews, the installation instruction are sparse regarding wall mounting, and the correct height to mount on a wall. Here are some of my installation suggestions and hints. First, I suggest that you test assemble it loosely with all of the components that you will be using for your installation on a workbench, so that you can see everything working together before you mount it (there will be parts left over). From that test assembly, I determined the amount of travel (elevation adjustment) available in the screw jack. If you mount the the bottom of the base plate on the wall at 8' above the driveway the rim height can be adjusted from about 7' to just over 10' at the top of the screw's travel. (The instructions give a minimum elevation reference from a hole in the middle of the mount to the ground, which is an odd way to provide this measurement.) I mounted the base plate into the solid concrete beam over the garage door, with 4" lag screws into long lag screw expanding sheilds. My only complaint about the screw jack mechanism is that is seemed to be inadequately lubricated from the factory. I took mine apart (remove the hook from the bottom) and discovered that it had only a small smear of grease on the middle of the screw. I completely greased the screw, the bearing washers and the sliding surfaces of the tubes with white lithium grease. This makes the action smoother, and will hopefully prevent corrosion. Lastly, when doing the final mounting, do not tighten all of the fasteners completely in each step of assembly. Having some "play" in the joints makes getting all of the bolt holes to line up easier. I did this entire installation alone (not recommended) and offer this last tip for the most awkward part of the assembly, mounting the backboard to the elevator arms. I held the backboard upside-down and backwards to then insert the bottom bolt through the bottom elevator arms and through the bottom backboard mounting holes. The bottom arms are hanging low to the ground at this point, so you're lower on the ladder, and more stable in this position. Then using the bottom bolt as a pivot point, swing the backboard upward into its final position (with the upper arms cranked down to the lowest position to make it easier to reach) and insert the upper bolt through the upper arms and upper backboard mounting holes. I did mounted the backboard without the rim in place to make it less cumbersome and lighter. When the mount and the backboard are all loosely assembled, then go back and tighten all of the fasteners to their final tightness.
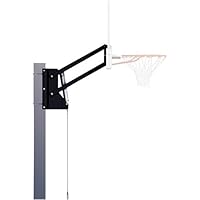
Click Here to see more reviews about: Spalding 316 U-Turn Lift System Bracket
Connects from backboard to 4-inch square pole or flat wall
 Get 8% OFF
Click here for more information about Spalding 316 U-Turn Lift System Bracket
0 comments:
Post a Comment